Cold Ferment Pizza Dough: The 48-Hour Method

A 48-hour cold ferment is the single biggest upgrade you can make to homemade pizza, and it costs nothing but planning. Cold fermentation means letting your dough rest in the fridge for one to three days, where the cold slows the yeast to a crawl while enzymes keep breaking the flour down into flavor. The result is a crust with real depth, better browning, and a lighter, more digestible chew than any same-day dough can give you. This is the schedule I default to for any pizza I actually care about.
I’ve run this side by side against same-day dough more times than I can count, splitting one batch to ferment cold and rushing another warm the same evening, and the cold-fermented one wins on flavor every time it isn’t even close. Here’s exactly how I run a 48-hour cold ferment, why each step matters, and how to fit it into a normal week. It’s one piece of the bigger picture in the complete pizza dough guide.
Why Cold Fermentation Beats a Quick Rise
Cold fermentation develops flavor and structure that a fast warm rise simply can’t, because the long, slow process lets enzymes convert starches into sugars and produce flavorful byproducts while the yeast works gently. A same-day dough rises fast but tastes flat and bread-like; a 48-hour cold ferment tastes complex, slightly tangy, and bakes up lighter.
The mechanism is worth understanding because it tells you why you can’t shortcut it. Yeast and the flour’s own enzymes are both working the whole time, but at fridge temperature the yeast is barely active while the enzymes keep grinding away, breaking starches into sugars. Those extra sugars do two things: they feed a slow, even fermentation that builds aromatic complexity, and they leave residual sugar in the dough that browns and leopards beautifully under heat (the Maillard reaction needs that sugar). A rushed warm dough never accumulates any of this. That’s why the cheapest, most effective upgrade in pizza is not a better oven — it’s two days of patience.
A 48-Hour Cold Ferment Recipe
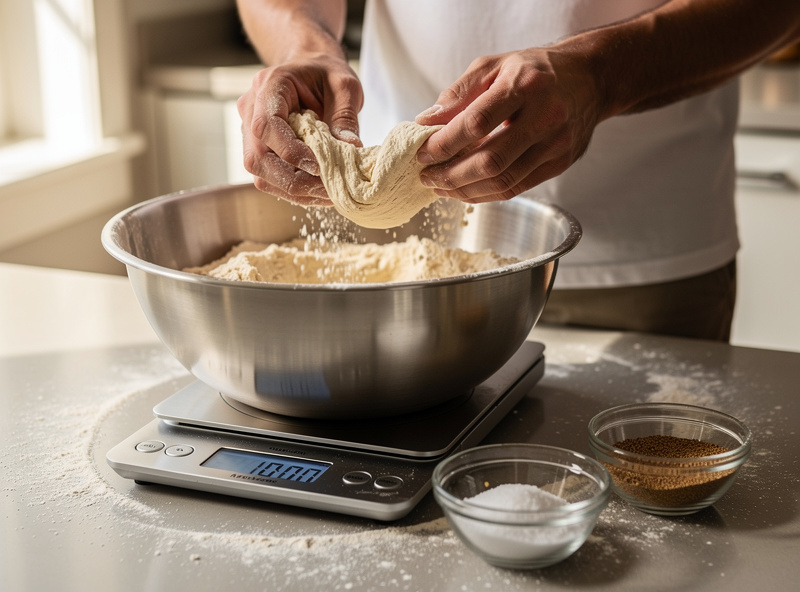
For a 48-hour cold ferment you want a low yeast quantity, because the dough has two full days to rise and too much yeast will over-proof it. A typical batch is flour 100%, water 62–65%, salt 2.8–3%, and instant dry yeast around 0.2–0.3% — that’s a tiny pinch, by design.
Here’s a concrete batch I’d make for four 250g balls: 620g strong bread flour, ~390g water (63%), 18g salt, and about 1.5g instant dry yeast. Weigh everything, including the water, and use a 0.1g scale for the salt and yeast because at these small amounts a rough guess will throw the ferment off. The low yeast is the part beginners always get wrong — they use a packet’s worth like a same-day dough and wake up to a fridge full of over-risen, deflating balls. For a two-day cold ferment, you want so little yeast that the dough barely moves for the first several hours. A precision scale that reads to 0.1g is the one tool I’d call non-negotiable for this — eyeballing the yeast is how cold ferments fail.
The Two-Day Schedule, Hour by Hour
The schedule is mix, a short room-temperature rest, ball, then a long cold ferment in the fridge, with the balls coming out to warm up before baking. The exact timing flexes around your life, but the structure stays the same across every cold-ferment dough I make.
This is how I run it. Evening, day one: mix the dough to a shaggy mass, rest 20–30 minutes (autolyse), then do three rounds of stretch-and-folds 20 minutes apart until smooth. Leave it covered at room temperature for an hour or two to get fermentation started. Before bed: divide and shape into tight balls, place them in a sealed container, and into the fridge they go. All of day two and into day three: they ferment cold, undisturbed. Baking day, 1–3 hours before you cook: pull the balls out to come to room temperature so they relax and stretch easily. That warm-up step is not optional — cold dough is tight and snaps back, and skipping it is the number one reason people think their dough “failed.”
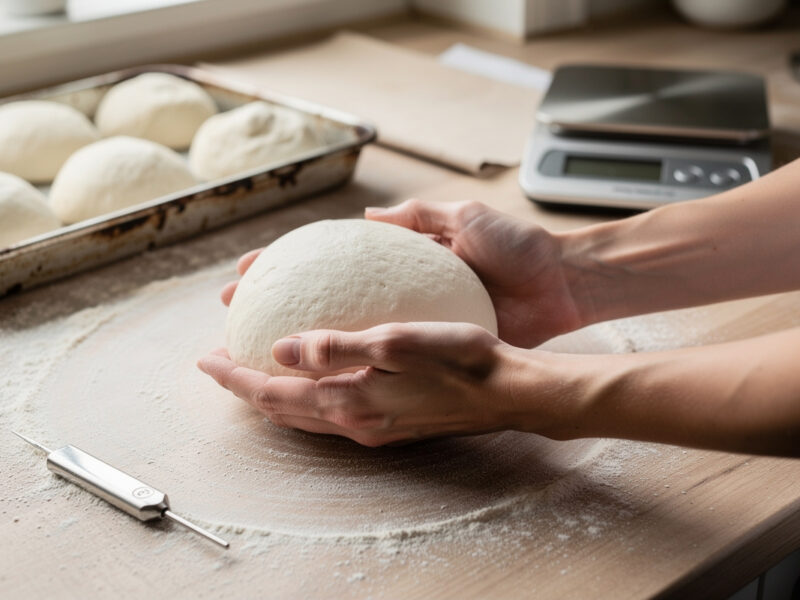
Balling and Storing for the Cold Ferment
Store cold-fermenting dough balls in an airtight container with enough space for each ball to expand without merging into its neighbors. A dedicated dough tray or individual sealed tubs both work; the key is an airtight seal so the surface doesn’t dry out and form a skin.
I ball mine with a tight, smooth skin (tucking the dough under itself to build surface tension), then space them out in a lidded tray. Over 48 hours they’ll relax and spread a little, so leave room — a cramped ball deforms against its neighbor and tears when you separate them. A light film of oil on the container helps them release cleanly. If you only have a big bowl, that works too, but the balls will fuse and you’ll lose the clean individual portions. A proper stackable dough proofing box is one of those cheap tools that quietly makes the whole process tidier, especially if you’re fermenting six or more balls. I cover the full storage timing in the dough ball storage guide.
Hydration for a Cold Ferment
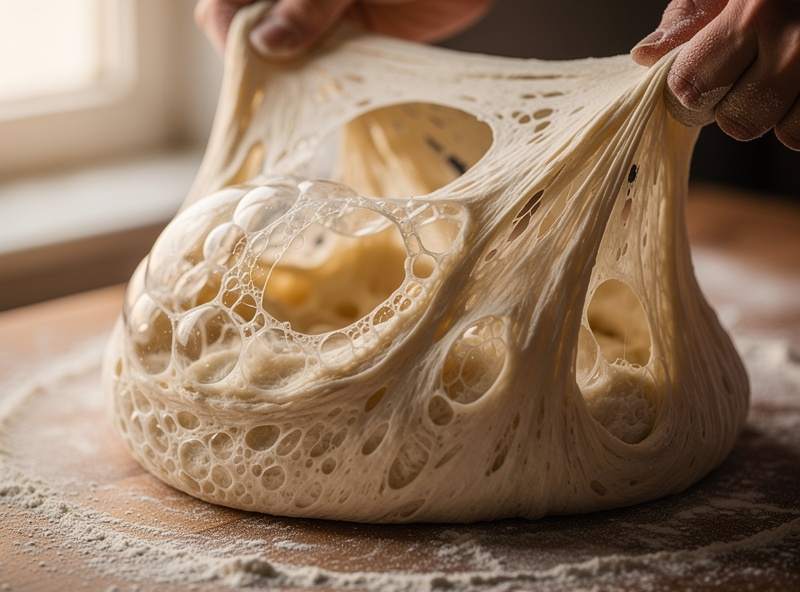
A cold ferment pairs well with a moderate hydration because the long rest builds extensibility on its own, so you don’t need to chase very high water to get an open crumb. I run my cold-ferment dough at 62–65% for most home ovens, which stays manageable after two days in the fridge.
The long ferment does a lot of the work that high hydration would otherwise do — it relaxes the gluten and opens the crumb naturally — so you can keep the hydration sensible and still get a light result. Cold dough also handles more easily than warm dough at the same hydration, which is a nice bonus: a 65% dough straight from the fridge feels firmer and less sticky than the same dough at room temperature. If you want to understand how to set this number for your specific oven, the hydration guide walks through it in detail.
When a Cold Ferment Goes Wrong
The two common failures are over-proofing (too much yeast or too long) and under-proofing (too little time or dough too cold). Over-proofed dough is slack, smells boozy or sour, and tears easily; under-proofed dough is tight and bland. Both are timing problems, not recipe problems.
If your balls have ballooned and collapsed and smell strongly of alcohol, you used too much yeast for the time — drop to 0.2% next batch. If the dough is still tight and lifeless after two days, your fridge may be very cold (slowing things too much) or you used too little yeast; bump it slightly or give it an extra warm hour at the start. The window for a well-made 48-hour dough is actually fairly forgiving — anywhere from about 24 to 72 hours will give you good results, with flavor deepening the longer it goes. Past 72 hours the gluten starts to break down and the dough gets hard to handle. When in doubt, a ball that’s relaxed, domed, and dotted with small bubbles is ready; trust that look over the clock.

Frequently Asked Questions
How long can pizza dough cold ferment in the fridge?
Cold ferment pizza dough for 24 to 72 hours for the best results, with flavor deepening the longer it goes. 48 hours is the sweet spot. Past 72 hours the gluten starts breaking down and the dough becomes slack and hard to handle.
How much yeast for a 48-hour cold ferment?
Use very little, around 0.2 to 0.3% of the flour weight, roughly 1.5g instant dry yeast per 600g flour. The dough has two full days to rise, so too much yeast will over-proof it. A 0.1g scale is essential for measuring such small amounts accurately.
Do I need to take cold ferment dough out before baking?
Yes. Pull the dough balls from the fridge 1 to 3 hours before baking so they reach room temperature. Cold dough is tight and snaps back when stretched; warmed dough relaxes and opens easily. Skipping this step is the top cause of dough that won’t stretch.
Why does cold fermented dough taste better?
During the long cold rest, enzymes break flour starches into sugars, building complex, slightly tangy flavor and leaving residual sugar that browns and leopards better under heat. A fast warm rise never develops these flavors, so it tastes flat and bread-like by comparison.
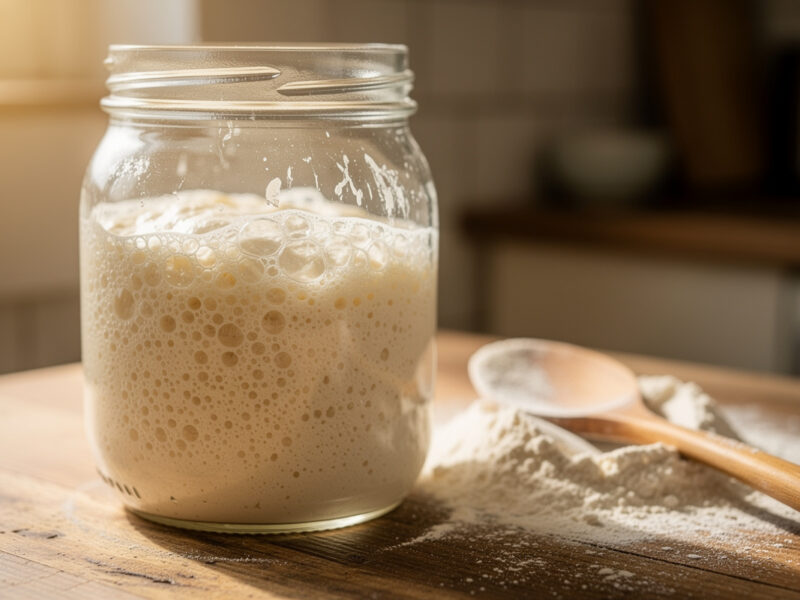
Can I cold ferment dough that already rose at room temperature?
Yes, a short room-temperature bulk rise after mixing kick-starts fermentation, then you ball and move it to the fridge for the long cold ferment. This two-stage approach is exactly how most cold ferment schedules work and gives the best flavor and structure.
As an Amazon Associate I earn from qualifying purchases. The dough tools I link are ones I’d use for this schedule; buying through these links supports the site at no cost to you.
Related Guides
- How to Make Pizza Dough: The Complete Guide — the full dough process.
- Pizza Dough Hydration Explained — setting the water percentage for your cold ferment.
- Pizza Dough Balls Storage — keeping balls right through a multi-day ferment.
More from This Cluster
- “Same-Day vs Overnight Pizza Dough: Which to Make”
- “Pizza Dough Balls: Storage
- “Pizza Dough Too Sticky? Fix It Without Adding Flour”
- “Poolish Pizza Dough: The Preferment Method”
- “00 Flour vs Bread Flour for Pizza: What Actually Matters”
- “Pizza Dough Hydration Explained (and How to Pick Yours)”
- “How to Make Pizza Dough: The Complete Guide”

About Kenny Nyhus Fadil
A home pizza maker documenting deck temps, dough logs, and the occasional wrecked launch.