How to Make Pizza Dough: The Complete Guide

Good pizza is decided long before the oven. After years of running the same dough across a gas Ooni, a dual-fuel dome, an indoor electric deck, and a plain steel in my kitchen oven, I can tell you the dough is the variable that actually changes the slice — the oven only finishes a job the dough already won or lost. This guide is the whole process I run, from the four ingredients up through hydration, fermentation, and ball management, written from a dough log that goes back further than any oven I own.
If you take one thing from this page: most “my pizza isn’t working” problems are dough problems, and most dough problems are time-and-temperature problems, not recipe problems. Flour, water, salt, yeast. The skill is in how you schedule them.
The Four Ingredients, and Why That’s All You Need
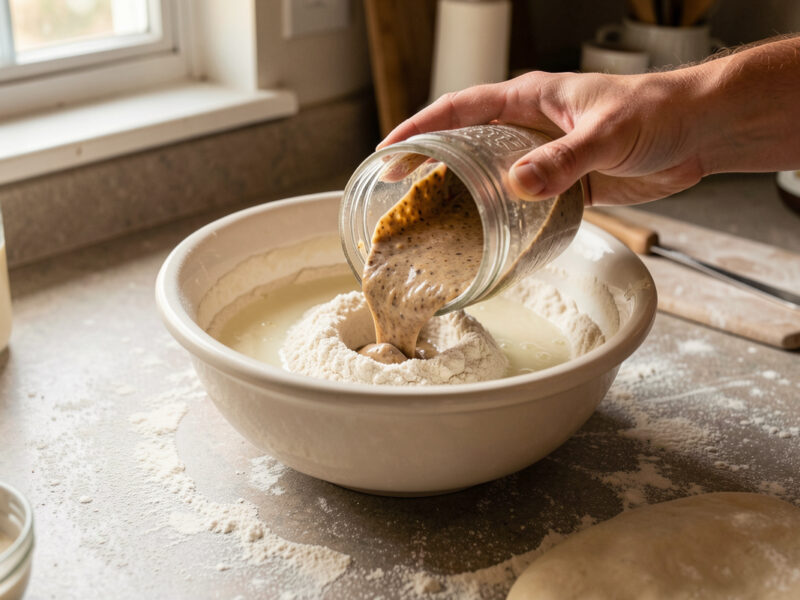
Real pizza dough is flour, water, salt, and a leavening agent — commercial yeast or a sourdough starter. No oil, no sugar, no milk for a Neapolitan or New York base. Everything else you see added in recipe blogs is either a different style entirely or a crutch for an under-fermented dough.
Here’s what each one actually does on the bench. Flour brings the protein that forms gluten, the elastic network that traps gas and gives you oven spring. Water hydrates that protein so it can link up, and the amount of water — hydration — sets how slack or stiff the dough is. Salt does three jobs at once: it seasons, it tightens the gluten so the dough holds its shape, and it slows the yeast so fermentation doesn’t run away from you. The yeast or starter eats sugars in the flour and exhales carbon dioxide, which is what inflates the crumb. Get the ratios and the timing right and the dough does the rest while you sleep. That last part — letting time do the work — is the single biggest lever, and it’s the one beginners skip.
Baker’s Percentage: The Only Math That Matters
Every dough number on this site is a baker’s percentage: each ingredient is stated as a percent of the flour weight, and flour is always 100%. A 65% hydration dough means 650g water per 1,000g flour. This is the language every serious dough recipe speaks, and once it clicks you stop following recipes and start dialing your own.
A workable home Neapolitan-leaning dough sits around flour 100%, water 60–65%, salt 2.8–3%, and yeast a fraction of a percent for a long ferment. The reason percentages matter more than gram counts is that they scale: I can make two dough balls or twenty from the same percentages, and I can compare a batch I made in March against one from last week because the ratios are directly comparable in my log. Weigh everything — including water — on a scale that reads to the gram, and a 0.1g scale for the salt and yeast. Volume measures (cups, teaspoons) are where consistency goes to die; a “cup” of flour can vary by 20% depending on how you scoop it, and that swing alone will wreck your hydration.
Hydration: The Dial That Changes Everything
Hydration is the percentage of water relative to flour, and it’s the number that most defines how your dough handles and bakes. Lower hydration (58–62%) gives a stiffer, easier-to-shape dough that’s forgiving for beginners; higher hydration (65–70%+) gives a more open, blistered crumb but a stickier dough that demands better handling and a hotter, faster bake.
The mistake I see constantly is people chasing the 75% hydration doughs they saw a pro handle, then fighting a sticky mess in a 250°C home oven that can’t bake it fast enough to set the structure. Hydration has to match your oven and your skill. In my dough log, my home-oven-on-steel dough runs around 62–63% — stiff enough to launch cleanly off a peel, dry enough that the bottom sets before the top burns. My 450°C electric deck dough runs higher, 65–68%, because the fast bake locks an open, wet crumb in place before it collapses. There’s a full breakdown in the pizza dough hydration guide, but the headline is: pick a hydration your oven can actually finish, then raise it only as your handling improves. If your dough is fighting you, see the sticky-dough fixes before you blame the recipe — most of the time the cause is too little flour development or too warm a dough, not too much water.
Matching Hydration to Your Oven
Heat is what sets a wet crumb. A 90-second Neapolitan bake at 430°C can carry a 65%+ dough because the structure flashes solid before it slumps. A 7-minute bake in a domestic oven at 250°C cannot — that wet dough has time to spread, the bottom goes gummy, and you get the dreaded gum line under the cheese. So the rule of thumb I work to: the slower your bake, the lower your hydration. It’s the cheapest fix nobody wants to hear, because it’s free.
Fermentation: Where Flavor and Digestibility Come From
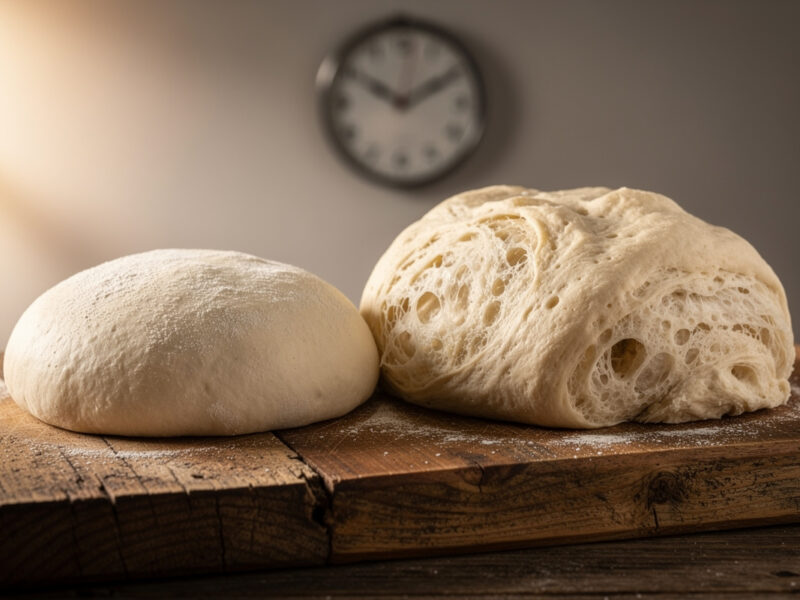
Fermentation is the resting period where yeast produces gas and, more importantly, enzymes and acids break down the flour into something more flavorful and more digestible. A short, warm fermentation (2–4 hours) makes bread-like, bland dough. A long, cold fermentation (24–72 hours in the fridge) develops complex flavor, better extensibility, and a lighter, more digestible crust.
This is the part of the process that separates forgettable homemade pizza from the kind that makes people ask what you did differently. The answer is almost always time. Cold fermentation slows the yeast right down so it works gently over days, while the enzymes keep breaking starches into sugars (which is also why a long-fermented dough leoparards and browns better — there’s more residual sugar for the Maillard reaction). My standing default for dough I care about is a 48-hour cold ferment, and the difference between that and a same-day dough is not subtle. If you’re deciding whether a long ferment is worth the planning, I broke down the side-by-side in same-day vs overnight dough — short version: same-day is fine for a weeknight, but cold ferment is where the dough gets interesting.
Bulk Ferment vs Cold Ferment
Most schedules I run have two stages: a short room-temperature bulk rise after mixing to get fermentation started, then balling and a long cold ferment in the fridge. Some schedules ball first, some ball after the cold rest — I do both depending on the flour. The thing to internalize is that warmth speeds the yeast and cold slows it, so you’re constantly trading clock time against fridge time. A dough that needs 24 hours cold might need only 6 hours at warm room temperature, but you’ll lose flavor depth in the trade.
Flour: 00, Bread Flour, and Protein
The flour you choose sets your dough’s strength and your bake’s character. “00” refers to the fineness of the grind (an Italian milling standard), not the protein content — what matters for pizza is the protein percentage and the W-strength, which determine how much gluten you can build and how long a ferment the flour can survive.
This is the spec people get wrong most often, so let me be precise: 00 is a grind, not a protein rating. You can buy a soft, low-protein 00 meant for a fast Neapolitan bake, and you can buy a high-protein “00 per pizza” milled specifically for long fermentation. A strong bread flour (around 12.5–13.5% protein) builds a robust gluten network that handles a long cold ferment and gives a chewier, more structured New York-style crust, with more browning at lower oven temperatures. A finer 00 gives a softer, more tender, extensible dough that shines at very high heat. For a domestic-oven bake on steel, I usually reach for a strong bread flour because it browns better at 250–280°C; for the electric deck running hot, a good 00 sings. The full trade-off is in the 00 flour vs bread flour comparison — but don’t overthink your first bags. A decent bread flour and time will outperform expensive imported 00 used in a rushed same-day dough every single time.
Direct, Poolish, and Biga: Three Roads to Good Dough
A direct dough mixes all ingredients at once and ferments as a single mass — simple, reliable, and what I’d start any beginner on. A preferment (poolish or biga) is a portion of the flour, water, and yeast mixed ahead and fermented on its own before being added to the final dough, building flavor and extensibility before you even start the main mix.
There’s a fourth road worth naming: sourdough. Instead of commercial yeast you raise the dough with a wild-yeast-and-bacteria starter, which is the same years-old culture I keep on my fermentation bench. It’s the most flavorful and the most demanding — you’re now managing the starter’s own schedule on top of the dough’s — and it deserves its own treatment rather than a footnote here. The honest hierarchy for someone building skill is: direct cold ferment first, poolish second once that’s repeatable, sourdough when you genuinely want to keep a culture alive. Every step up adds flavor and adds variables in equal measure, and the variables are what bite you on a busy evening.
You don’t need a preferment to make excellent pizza — a well-cold-fermented direct dough is genuinely all most people ever need. But a poolish (a wet, equal-parts-flour-and-water preferment) buys you an extra layer of aromatic complexity and a more open, tender crumb, and it’s the method I reach for when I want the dough itself to be the star. A biga is the stiff, lower-hydration cousin, common in many Italian doughs, and gives a slightly different chew. The practical advice: master a direct cold-ferment dough first, log it until it’s repeatable, then add a poolish to your rotation. Adding complexity before you’ve nailed the basics just gives you more variables to mismanage.
Dough Method Comparison
Here’s how the main approaches stack up across the things that actually matter when you’re deciding what to make this week. These are the trade-offs as I’ve logged them, not absolutes — your flour and kitchen will shift the edges.
| Method | Effort / Planning | Flavor Depth | Crumb | Best For |
|---|---|---|---|---|
| Same-day direct (warm) | Low — 4–6 hrs | Mild, bread-like | Tighter | Weeknight, last-minute |
| Overnight cold direct | Low — plan 1 day | Good, noticeably better | Lighter | The reliable default |
| 48–72hr cold direct | Medium — plan ahead | Complex, tangy edge | Open, digestible | Best result for the effort |
| Poolish + cold ferment | Higher — two mixes | Deep, aromatic | Most open, tender | When dough is the star |
| Sourdough (starter) | Highest — keep a culture | Most complex, tangy | Open, chewy | Flavor obsessives |
Mixing and Developing the Gluten
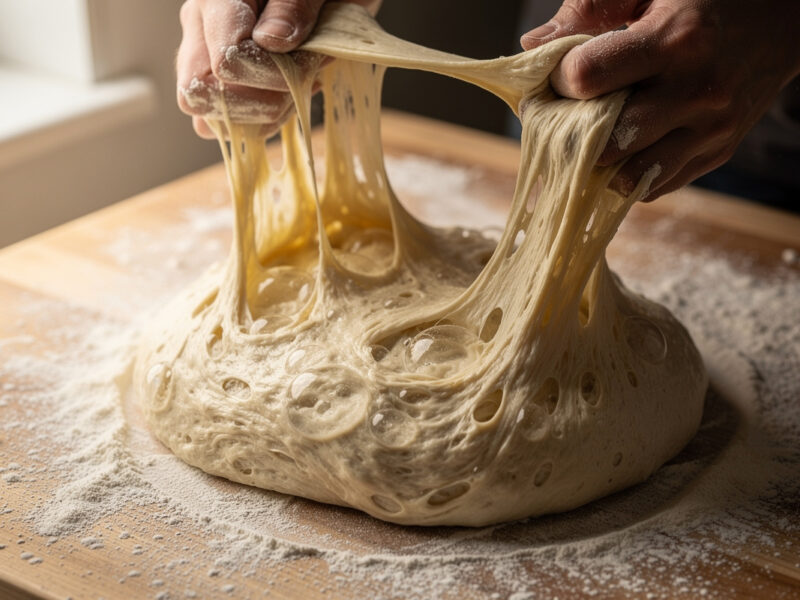
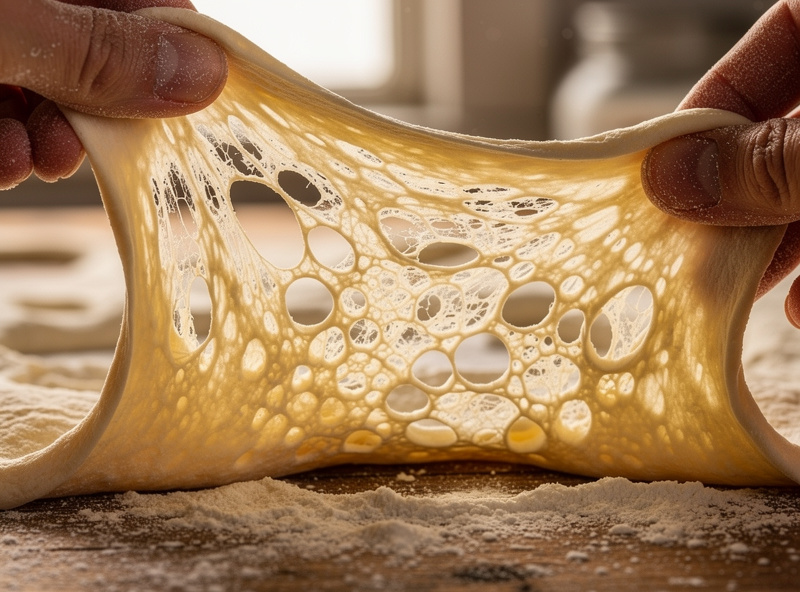
Gluten development is what turns a shaggy flour-and-water paste into a smooth, elastic dough that holds gas. You can build it through active kneading, through time (the “no-knead” or stretch-and-fold approach where the gluten organizes itself during long rests), or a mix of both — and for long-fermented doughs, time does most of the work for you.
I rarely knead hard anymore. For a cold-ferment dough I mix to a shaggy mass, rest it 20–30 minutes so the flour fully hydrates (an autolyse), then do a few rounds of stretch-and-folds spaced 20 minutes apart. By the third fold the dough is smooth and elastic, and the long cold rest finishes the development. The windowpane test tells you when you’re there: pinch off a piece and stretch it — if it goes thin and translucent without tearing, the gluten is built. The biggest mixing error is adding flour because the dough feels sticky early on; give it time and folds instead, because that early stickiness is just flour that hasn’t finished drinking its water yet.
Dough temperature during mixing matters more than most home bakers realize. Friction from a stand mixer heats the dough, and a dough that finishes the mix warm will over-ferment before you’ve planned for it. I aim for a final dough temperature in the low-to-mid 20s°C, which for me usually means cool water in summer and skipping the heavy machine kneading entirely. If you only own a kitchen oven and a steel, hand-mixing a cold-ferment dough is genuinely the better path — you keep the dough cool and you build less of the tight, over-worked gluten that fights you at shaping. Salt timing is a smaller lever but a real one: I add salt with the flour for convenience, though some bakers hold it back during the autolyse to let the gluten organize faster. Either works; pick one and keep it constant so your log stays comparable.
Balling, Storage, and Timing the Bake
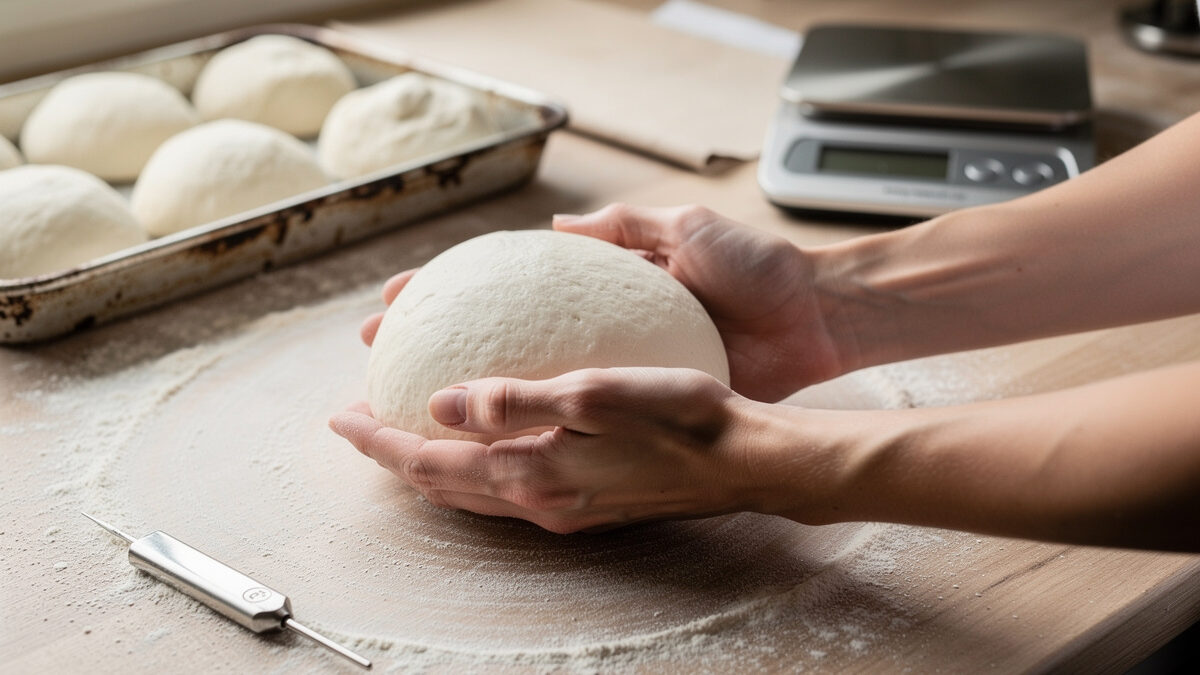
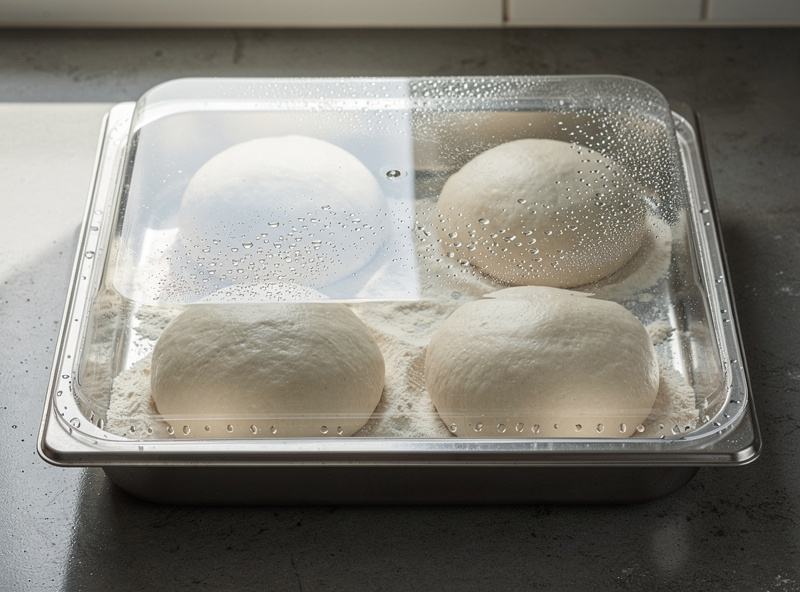
After the bulk ferment, the dough is divided and shaped into tight balls, which are then proofed until relaxed and slightly puffy before shaping. How you ball and store them — and crucially when you take them out of the fridge — decides whether they stretch like a dream or fight you and tear.
A well-formed ball has a tight, smooth skin (surface tension you build by tucking the dough under itself), which helps it hold a round shape and rise upward rather than spreading flat. Store balls in a sealed, lightly oiled container or a proper dough tray with space between them, because they’ll expand and a cramped ball deforms its neighbors. A well-formed ball also stores better through a long ferment, which is why stronger flour earns its place on multi-day schedules. The timing detail that fixes more “my dough won’t stretch” complaints than anything else: take the balls out of the fridge 1–3 hours before baking so they come to room temperature. Cold dough is tight and snaps back; relaxed, room-temperature dough opens easily. I cover the full schedule and how long balls actually last in dough ball storage and timing, including the signs a ball has over-proofed and is past its best.
Common Dough Problems and What Causes Them
Almost every dough failure traces back to one of a handful of causes, and once you can read the symptom you can fix the schedule. Dough too sticky to handle usually means under-developed gluten or too warm a dough, not too much water — develop it more and chill it. Dough that tears when you stretch it is tight and under-proofed; let the balls warm up and relax longer. A dense, bready crust means under-fermentation — it needed more time, which is exactly the case for going to a longer cold ferment. A pale crust that won’t brown points to under-fermentation too (no residual sugar) or simply not enough oven heat — and if the issue is that the crust browns unevenly while staying gummy, it’s usually a hydration-versus-oven mismatch. A gummy line under the cheese is a bake problem — too wet a dough for too slow an oven, or too many wet toppings. The pattern to internalize is that the fix is almost never “different recipe” — it’s “different timing or temperature.” Dial the schedule, log the result, repeat. That logbook is the whole secret; everything else is just flour and patience.
Frequently Asked Questions
What is the best hydration for beginner pizza dough?
Start at 60-62% hydration. It is stiff enough to shape and launch easily without sticking, and forgiving in a standard home oven. Raise hydration toward 65% only after your handling improves and your oven can bake fast enough to set a wetter crumb.
Do I need 00 flour to make good pizza?
No. A strong bread flour around 12.5-13.5% protein makes excellent pizza and browns better at home-oven temperatures. 00 is a grind fineness, not a protein rating, and shines mainly at very high heat. Time and fermentation matter far more than the flour brand.
How long should pizza dough ferment?
For the best result-to-effort ratio, cold ferment dough in the fridge for 24 to 72 hours. A 48-hour cold ferment develops complex flavor, better browning, and a lighter, more digestible crust. Same-day dough works in 4 to 6 hours but tastes noticeably plainer.
Why is my pizza dough so sticky?
Usually the gluten is under-developed or the dough is too warm, not that there is too much water. Give it time and a few stretch-and-folds so the flour finishes hydrating, and keep the dough cool. Adding flour to fix early stickiness makes the crust dense.
Can I make pizza dough without yeast?
You can use a sourdough starter instead of commercial yeast, which gives more complex, tangy flavor but requires keeping a live culture and a longer ferment. True no-leavening flatbreads exist but will not give the airy, risen crust most people want from pizza.
How far in advance should I take dough out of the fridge?
Take dough balls out 1 to 3 hours before baking so they reach room temperature. Cold dough is tight and snaps back when stretched; relaxed, room-temperature dough opens easily without tearing. This single timing step fixes most won’t-stretch complaints.
Keep Reading: The Dough Deep-Dives
- Pizza Dough Hydration Explained — how to pick the right water percentage for your oven and skill level.
- Cold Ferment Pizza Dough (48 Hours) — the standing default schedule, step by step.
- 00 Flour vs Bread Flour — what the grind and protein numbers actually mean for your crust.
- Poolish Pizza Dough Method — the preferment that makes the dough the star.
- Same-Day vs Overnight Dough — when each schedule is worth it.
Keep Reading: The Dough Deep-Dives — Complete Spoke List
Full spoke list of the Pizza Dough cluster:
- “Same-Day vs Overnight Pizza Dough: Which to Make”
- “Pizza Dough Balls: Storage
- “Pizza Dough Too Sticky? Fix It Without Adding Flour”
- “Poolish Pizza Dough: The Preferment Method”
- “00 Flour vs Bread Flour for Pizza: What Actually Matters”
- “Cold Ferment Pizza Dough: The 48-Hour Method”
- “Pizza Dough Hydration Explained (and How to Pick Yours)”
More From This Site
Other guides across pizza dough and the rest of the Pizzatech library:
- “What Size Pizza Oven Should You Actually Buy?”
- “Used Pizza Oven Checklist: What to Inspect”
- “Pizza Oven for Cold Climate: The Nordic Reality”
- “Is an Indoor Electric Pizza Oven Worth It?”
- “Gas vs Wood Pizza Oven: The Honest Difference”
- “Ooni Koda 16 Review: A Long-Term Verdict”
- “How to Choose a Pizza Oven: The Complete Buying Guide”
- “Home Oven Max Temp Workarounds for Better Pizza”
- “Pizza Stone and Steel Care: Cleaning
- “Pizza on the Grill With a Stone: What Actually Works”
- “Preheat Time: Steel vs Stone (and Why the Gap Matters)”
- “The Broiler Method: Real Neapolitan-ish Pizza in a Home Oven”
- “Pizza Steel Thickness: How Thick Is Worth It?”
- “Pizza Steel vs Stone: The Honest Home-Oven Verdict”
- “Same-Day vs Overnight Pizza Dough: Which to Make”
- “Pizza Dough Balls: Storage
- “Pizza Dough Too Sticky? Fix It Without Adding Flour”
- “Poolish Pizza Dough: The Preferment Method”
- “00 Flour vs Bread Flour for Pizza: What Actually Matters”
- “Cold Ferment Pizza Dough: The 48-Hour Method”
- “Pizza Dough Hydration Explained (and How to Pick Yours)”

About Kenny Nyhus Fadil
A home pizza maker documenting deck temps, dough logs, and the occasional wrecked launch.