Pizza Dough Hydration Explained (and How to Pick Yours)

Hydration is the single number that decides how your pizza dough handles, stretches, and bakes — and it’s the one most home bakers get wrong by copying a recipe that was written for a different oven than theirs. Hydration is simply the weight of water as a percentage of the flour weight: 650g of water to 1,000g of flour is 65% hydration. Get this number matched to your oven and your skill, and most “my dough won’t cooperate” problems disappear.
I’ve baked the same recipe at hydrations from 58% all the way to 72% across four different ovens, logging each one, and the lesson is consistent: there is no universally “correct” hydration. There’s only the hydration that’s right for your heat and your hands. This guide is how I think about that number on the bench. For the broader process this fits into, start with the complete pizza dough guide.
What Hydration Actually Means
Hydration is the ratio of water to flour by weight, expressed as a baker’s percentage where flour is always 100%. At 60% hydration you add 600g of water per kilo of flour; at 70% you add 700g. That extra 100g of water completely changes how the dough feels, stretches, and behaves under heat.
The reason it’s expressed against flour weight rather than as an absolute is that it scales perfectly and lets you compare doughs. When I note “63% on the steel” in my dough log, that number means the same thing whether I’m making two balls or twenty, and it’s directly comparable to the “67% on the deck” entry from a different night. Once you start thinking in hydration percentages instead of following cup measures, you’ve made the jump from following recipes to dialing your own dough — and you can’t get there with volume measures, because a cup of flour can vary 20% by weight depending on how you scoop it.
Low vs High Hydration: The Real Trade-Off
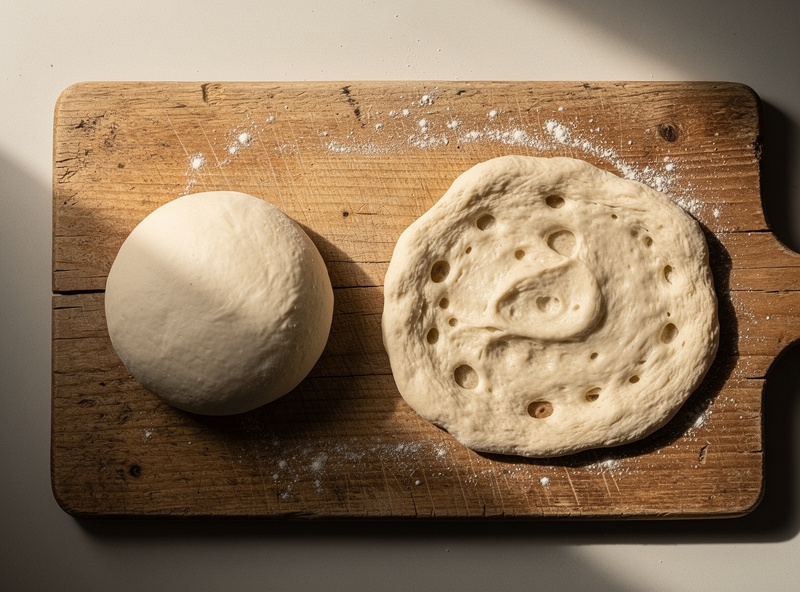
Lower-hydration dough (58–62%) is stiffer, drier, and far easier to shape and launch, making it the beginner-friendly and home-oven-friendly choice. Higher-hydration dough (65–72%) produces a lighter, more open, more blistered crumb but is stickier, harder to handle, and needs a hotter, faster bake to set before it slumps.
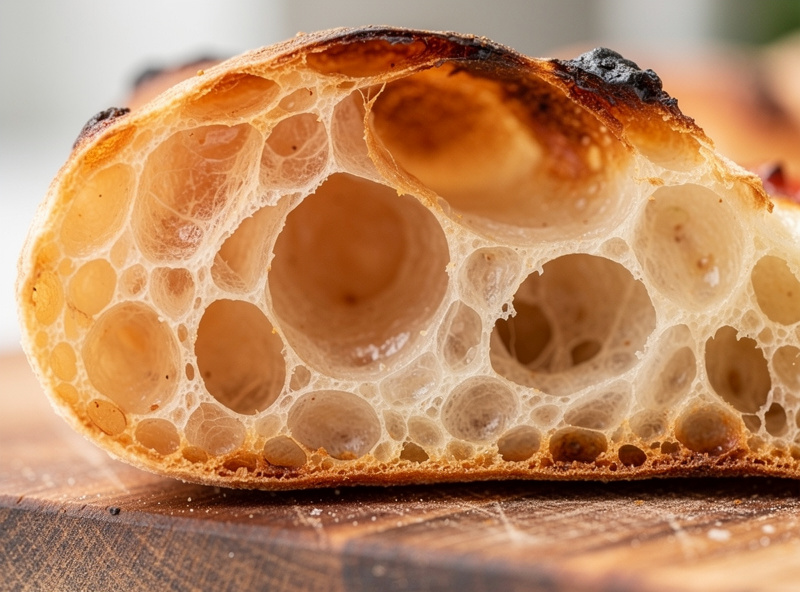
Think of it as a slider between “easy to handle” on one end and “open, airy crumb” on the other. Low hydration gives you a tight, predictable dough that holds its shape, peels cleanly, and forgives a slower bake — the bottom sets nicely on a domestic oven steel before the top scorches. The cost is a denser, less dramatic crumb. High hydration gives you the big, irregular, custardy holes everyone wants from a great Neapolitan, but only if your oven can flash that wet structure solid in a couple of minutes. Try to bake a 70% dough in a 250°C home oven and you’ll get a pancake that spreads and goes gummy underneath. The water has nowhere to go fast enough.
Matching Hydration to Your Oven
The single most useful rule I know: the slower your oven bakes, the lower your hydration should be. A blazing 430°C oven that bakes a pizza in 90 seconds can carry 65–70% because the structure sets almost instantly; a 250°C home oven baking in 6–8 minutes needs 60–63% so the base can dry and firm up before the dough has time to spread and go wet in the middle. How thick your steel or stone is changes that baking window significantly — the pizza steel thickness guide covers how gauge affects heat delivery and whether a thin steel can match a thick one for home baking.
Here’s how it maps across the ovens I run, straight from the log. On a 6mm steel under the broiler in my kitchen oven (peaks around 280°C at the stone), I run 62–63% — any wetter and the long bake gives me a gum line. In a portable gas oven hitting 400°C-plus, I’ll go 64–66%. On my indoor electric deck running 450°C with a biscotto stone, I push to 67–68% because the fast, fierce bake locks an open, wet crumb in place before it can collapse. The pattern is dead simple once you see it: more heat buys you the ability to handle more water. If your oven tops out low, embrace a lower hydration instead of fighting physics. The choice of baking surface — steel or stone — affects that temperature ceiling too; I went through the full trade-off in the pizza steel vs stone guide if you’re deciding which to buy or use.
Recommended Hydration by Setup
Use this as a starting point, then adjust by a percent or two based on your flour and your results. These are the numbers I’d hand a friend setting up each rig, not laws of nature.
| Oven / Setup | Approx. Stone Temp | Bake Time | Hydration to Start |
|---|---|---|---|
| Home oven, baking tray | ~230°C | 10–12 min | 58–60% |
| Home oven, pizza steel + broiler | ~280°C | 5–8 min | 62–63% |
| Portable gas oven | ~400°C | 2–3 min | 64–66% |
| Indoor electric deck (biscotto) | ~450°C | 90 sec | 66–68% |
| Wood/dual-fuel dome | ~450°C+ | 60–90 sec | 65–68% |
Handling Higher Hydration Without the Mess
Most people who fail at higher hydration didn’t add too much water — they under-developed the gluten or kept the dough too warm. Strong gluten development through stretch-and-folds, a cold dough temperature, and wet hands instead of more flour are what make a wet dough manageable.
When I work a 67% dough, I never reach for the flour bag when it sticks. I wet my hands, I use a bench knife to move it, and I make sure the gluten was properly built during mixing — a few rounds of stretch-and-folds during the bulk rise so the dough has the strength to hold all that water. A cold dough straight from a long fridge ferment is also dramatically easier to handle than a warm one, because cold gluten is firmer and less tacky. If your dough feels like glue, the fix is rarely “use less water” — it’s develop it more and keep it cool. I go deep on this in the sticky dough troubleshooting guide.
Why Flour Choice Affects Your Hydration Ceiling
Stronger, higher-protein flour can absorb more water and hold a higher hydration without turning to soup, because there’s more gluten to structure all that water. A weaker, lower-protein flour will feel slack and sticky at a hydration that a strong bread flour handles comfortably.
This is why you can’t pick a hydration number in isolation from your flour. A strong bread flour around 13% protein will happily take 65%+ and stay workable; a soft, low-protein all-purpose flour might feel overhydrated at 60%. If you switch flours and your dough suddenly feels wrong at your usual hydration, the flour is the variable, not your technique. I unpack the protein and grind differences in the 00 flour vs bread flour comparison — but the practical takeaway is to change one variable at a time and log it, so you always know which lever moved your result.
How to Dial in Your Own Number
Start lower than you think you need, bake a few times, and only raise hydration once you can handle the current dough cleanly and your oven is finishing the bake without gumminess. Raising hydration 2% at a time and logging each batch is how you find your kitchen’s sweet spot without wasting a month of flour.
The method I’d recommend to anyone serious: pick the starting hydration from the table above, make that dough three or four times until it’s repeatable and you understand how it handles, then bump it up 2% and see if the crumb improves or the handling falls apart. Keep the rest constant — same flour, same ferment schedule, same oven — so the only thing changing is the water. Within a handful of bakes you’ll find the number where your crumb is as open as your oven can set and your hands can still manage the dough. Write it down. That’s your number, and it’ll be different from mine because your oven and hands are different. That’s the whole point.
Frequently Asked Questions
What hydration should I use for home oven pizza?
For a standard home oven with a pizza steel, start at 62-63% hydration. On just a baking tray at lower heat, drop to 58-60%. Slower, cooler bakes need lower hydration so the base sets before the dough spreads and goes gummy underneath.
Is higher hydration always better for pizza?
No. Higher hydration gives a more open crumb but only if your oven is hot enough to set the structure fast. In a slow home oven, high hydration spreads and turns gummy. Match hydration to your oven’s heat, not to what a pro uses in a 450C deck.
Why is my high-hydration dough so sticky?
Usually the gluten is under-developed or the dough is too warm, not that there is too much water. Build strength with stretch-and-folds, keep the dough cold from a fridge ferment, and use wet hands instead of more flour. Adding flour makes the crust dense.
How do I measure hydration?
Hydration is water weight divided by flour weight, as a percentage. 650g water to 1,000g flour is 65%. Always weigh both flour and water on a scale; volume measures like cups vary too much and will throw your hydration off by a wide margin.
Does flour type change the hydration I can use?
Yes. Stronger, higher-protein bread flour absorbs more water and holds higher hydration comfortably. Weaker, low-protein flour feels slack and sticky at the same percentage. If you switch flours, expect to adjust your hydration to match.
Related Guides
- How to Make Pizza Dough: The Complete Guide — the full process this fits into.
- Pizza Dough Too Sticky? Here’s the Fix — handling wet dough without drowning it in flour.
- 00 Flour vs Bread Flour — how protein sets your hydration ceiling.
More from This Cluster
- “Same-Day vs Overnight Pizza Dough: Which to Make”
- “Pizza Dough Balls: Storage
- “Pizza Dough Too Sticky? Fix It Without Adding Flour”
- “Poolish Pizza Dough: The Preferment Method”
- “00 Flour vs Bread Flour for Pizza: What Actually Matters”
- “Cold Ferment Pizza Dough: The 48-Hour Method”
- “How to Make Pizza Dough: The Complete Guide”

About Kenny Nyhus Fadil
A home pizza maker documenting deck temps, dough logs, and the occasional wrecked launch.