Pizza Toppings and Cheese: The Complete Guide

Here is the short version of this pizza toppings guide: on a 90-second Neapolitan bake, the topping load is a thermal budget, not a flavor wish-list — roughly 80–100g of sauce, a similar weight of cheese, and nothing else that hasn’t earned its place. Overload the pie and the center never sets; the base goes gummy, the cheese weeps, and the whole thing slides off the peel as a wet mess. I have launched that mistake more times than I’ll admit. This guide is about outcomes — what actually survives the heat — not about prep technique, which I cover separately in the sauce-styles work.
I bake in Sweden, where a proper outdoor oven is a deliberate act of engineering rather than a backyard default, and I run one dough as the control across a portable gas oven, a dual-fuel dome, and an indoor electric. That setup is why my topping calls are heat-honest: I’ve watched the same fresh mozzarella behave like a gift at 280°C in my home oven and like a flood at 450°C in the electric. The topping that works is the one that matches the bake time, and the bake time is set by your oven, not your appetite. Everything below comes out of that dough log: same batch, many ovens, IR gun on the stone before every launch.
The one rule that governs every topping decision
The single principle behind this whole guide is heat exposure time. A topping does not care how good it tastes raw; it cares how many seconds it spends under fierce heat and how much water it carries onto a crust that is trying to set. In a 90-second Neapolitan bake the cheese barely has time to melt, so it must be a cheese that melts fast and sheds little water. In a 6–10 minute home-oven bake on a steel or stone, the same cheese has time to weep, pool, and re-set, so the rules invert.
That is why I refuse to give a universal “best toppings” list. The honest answer is that the best toppings are the ones whose water content and melt speed match your oven’s bake window. Get that pairing right and a three-ingredient pizza beats a loaded one every time. Get it wrong and no amount of premium burrata rescues a soggy center. The rest of this guide is just that principle applied to cheese, sauce, and the things you pile on top.
Cheese: melt speed and water content are the whole game
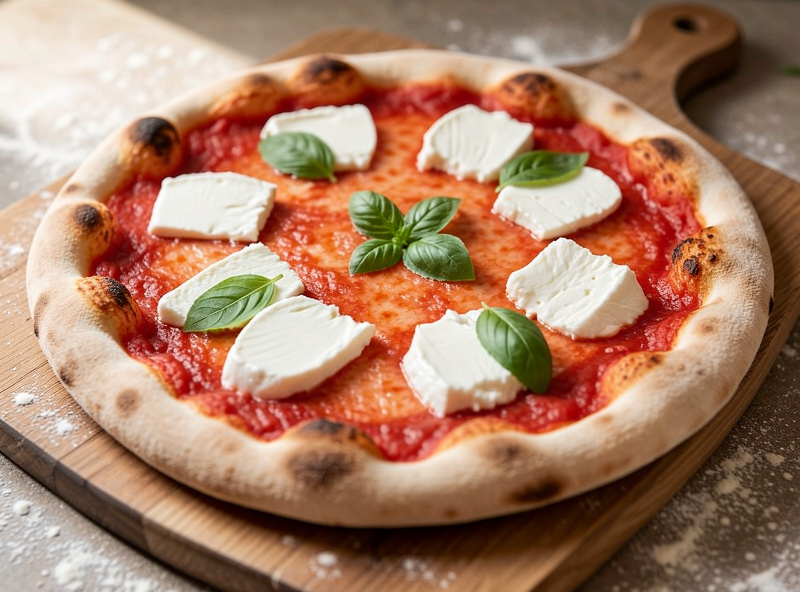
Cheese is where most home pizzas fall apart, and it is almost always a water problem dressed up as a flavor choice. Fresh mozzarella is a wet cheese — it can run 50–60% moisture — and that water has to go somewhere. In a fast oven it flashes off and you get those gorgeous milky pools; in a slow home oven it leaks into the dough and steams the base from above. Low-moisture mozzarella is the opposite: drier, saltier, it melts into a cohesive stretchy layer that browns predictably and forgives a longer bake.
Neither is “better.” They are tools for different ovens. I run fresh mozzarella in the electric and the dome where the bake is short and hot; I lean on low-moisture or a blend in the home oven where the bake is longer. I worked the full side-by-side — including how I dry-brine and rest fresh mozzarella to pull water out before it ever hits the pie — in the fresh vs dry mozzarella guide. And when you want the stretch of low-moisture with the milk of fresh, the answer is a deliberate blend, which has its own melt math I unpack in the cheese blend melting guide.
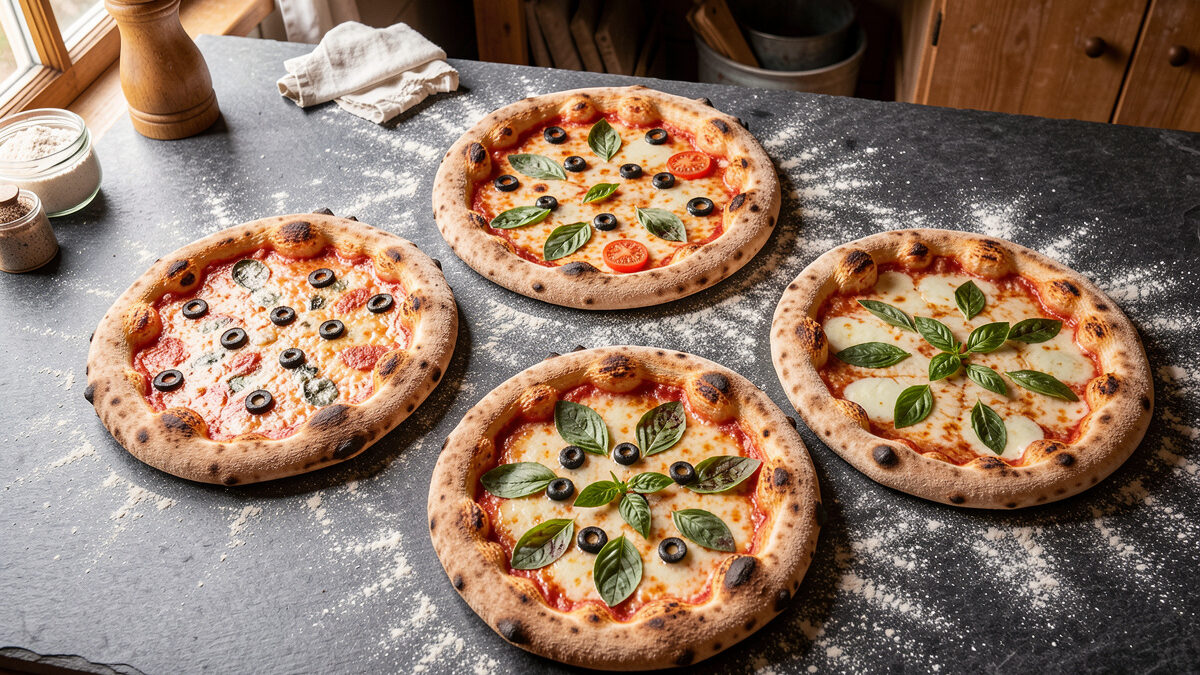
The number to remember: cheese should be applied in islands, not a solid sheet, and it should weigh roughly the same as your sauce. A solid lid of cheese traps steam and prevents the leoparding I chase. Gaps let the heat reach the sauce and the cornicione, and they let moisture escape upward instead of downward into your base.
Sauce: it is a topping, and its water is the first thing that betrays you
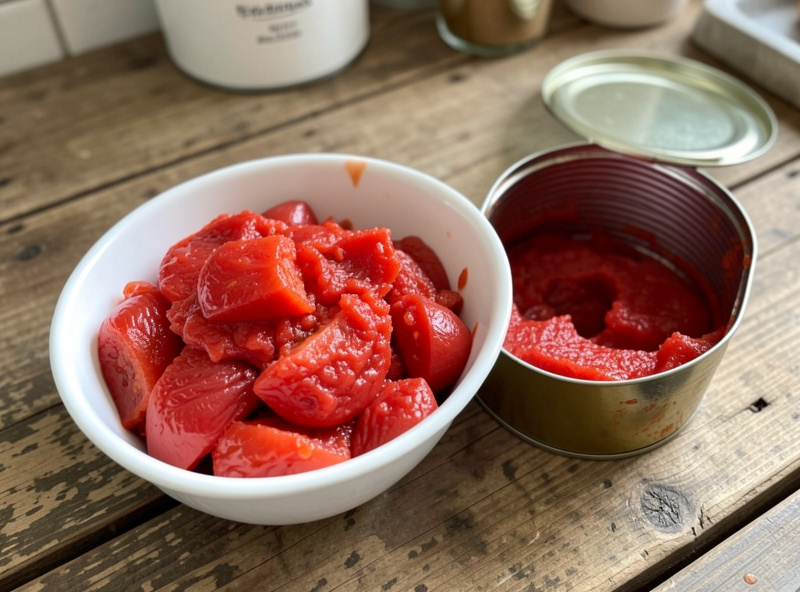
People treat sauce as a given, but on a fast bake the sauce is the heaviest water load on the pizza, and a watery sauce is the most common reason a center stays raw. The fix is not to cook the sauce down into a paste — that kills the bright, raw-tomato character that defines a good Neapolitan — it is to start with the right tomatoes and to drain or hand-crush rather than blend. A blended sauce aerates and thins; a hand-crushed one keeps its body and sits where you put it.
The tomatoes themselves are a real decision, not a snobbery. The difference between a thin, acidic canned tomato and a dense, sweet one is the difference between a sauce that floods and one that holds. I tasted and cooked down a shelf of options — San Marzano DOP, domestic plum, crushed versus whole — for the best canned tomatoes for pizza sauce guide, and the headline is that whole peeled tomatoes you crush yourself beat pre-crushed almost every time, because pre-crushed cans hide a lot of thin juice. Apply sauce thin: about 80g for a 12-inch pie, spread with the back of a ladle, leaving the cornicione bare.
The 90-second problem: what actually survives a Neapolitan bake
This is the part of the guide that separates a real wood-or-gas pizza nerd from a recipe blog. At 430–480°C the pizza is done in 60–90 seconds, and most toppings simply cannot cook in that window. Raw sausage stays raw. Thick onion stays sharp and crunchy. A pile of mushrooms dumps its water and steams. Fresh basil added before the bake turns black and bitter. The fast oven is brutally unforgiving, and the people who post charred-edge beauties with ten toppings are either baking far longer than they admit or serving half-raw pizza.
The discipline is pre-cooking and thin-cutting. Anything that needs real cooking time — sausage, peppers, onions, mushrooms — gets cooked or sweated first, so the oven only has to warm it through and marry it to the cheese. Anything delicate — basil, prosciutto, arugula, a drizzle of good oil — goes on after the bake, not before. I built the full survival list, with cut thicknesses and pre-cook notes for each, in the toppings that survive a 90-second bake guide. If you only take one habit from it: slice everything thinner than you think, and pre-cook anything you would not happily eat raw.
This is also where oven class changes the rules completely. In my home oven at 280°C the bake runs 6–9 minutes, which is plenty of time to cook a thin raw sausage or soften an onion — so the home oven is actually more forgiving of toppings than the screaming-hot specialty oven, even though it is worse for the crust. That trade-off — crust quality versus topping latitude — is one of the most useful things to understand before you spend money, and it ties straight into the gas vs wood and indoor electric decisions.
The topping load chart: matching ingredients to bake time
This is the table I wish someone had handed me when I started. It maps common toppings to whether they survive a fast 90-second bake, a medium dome bake, or only a longer home-oven bake — and what to do to each one. Weights and times are the ranges from my own dough log, not manufacturer claims.
| Topping | 90-sec bake (430–480°C) | Home oven (250–290°C, 6–9 min) | Prep that fixes it |
|---|---|---|---|
| Fresh mozzarella | Excellent | Weeps — needs draining | Tear, dry-brine, rest on a towel 20 min |
| Low-moisture mozzarella | Good, can stay pale | Excellent | Shred cold, apply in islands |
| Raw Italian sausage | Stays raw | Cooks if thin | Pinch into thin nuggets, pre-brown for fast ovens |
| Mushrooms | Steam and flood | Acceptable if sliced thin | Dry-sauté first to drive off water |
| Onion | Sharp, crunchy | Softens if sliced paper-thin | Slice on a mandoline or sweat first |
| Pepperoni (cured) | Excellent, cups and crisps | Good | None — cured meats love the heat |
| Fresh basil | Burns black | Burns | Add after the bake, every time |
| Prosciutto / arugula | Add after bake | Add after bake | Never bake delicate raw greens or cured ham |
| Bell peppers | Raw, watery | Soften if thin | Roast or sweat before topping |
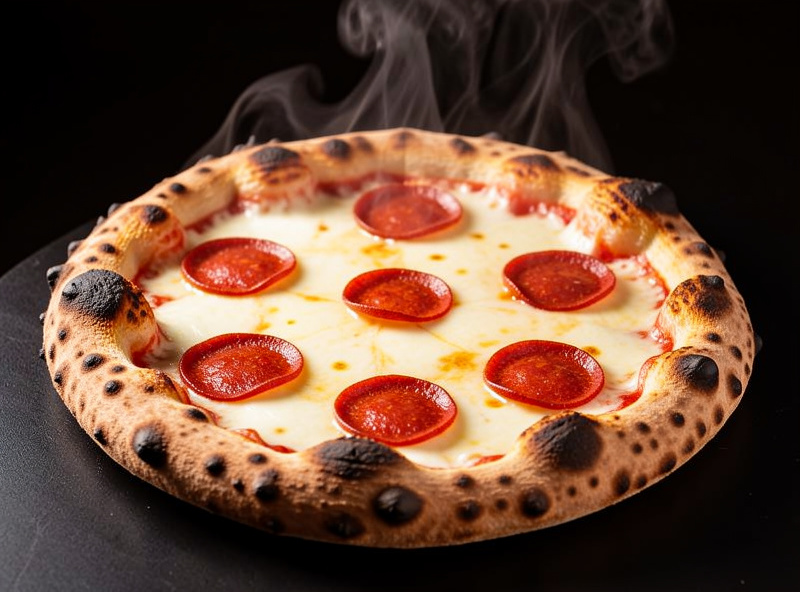
If you read one row, read pepperoni: cured meats are the great exception — they are already cooked, low in water, and high in fat, so fierce heat renders them into crisp, cupping little dishes of flavor. That is why cured toppings dominate fast-oven pizza and raw vegetables do not. The pattern holds: pre-cooked and low-water wins, raw and wet loses.
How oven class rewrites every topping rule
I keep coming back to oven class because it is the variable that changes the answer more than any ingredient choice. Here is how I think about toppings across the three ovens I run against one dough.
Indoor electric (the 450°C biscotto weapon): short, fierce bakes. Fresh mozzarella shines, sauce must be thin and low-water, and every topping must be pre-cooked or cured. This is my Swedish-winter reference and the most demanding on topping discipline. The stone temperature discipline that makes it work is in the stone temperature by style guide.
Dual-fuel dome (the gas-vs-wood platform): a touch more forgiving than the electric, with a slightly longer bake if you run it cooler. This is where I test whether wood actually changes topping flavor at speed — and my honest finding is that at 90 seconds the smoke barely touches the toppings. The verdict lives in the gas vs wood piece.
Home oven with steel and broiler: the longest bake of the three, and counterintuitively the most topping-friendly. You can run a slightly heavier load, cook a thin raw sausage, and soften an onion in the bake. The crust suffers compared to the specialty ovens, but the topping latitude is real. The broiler method is how you claw back enough top heat to still melt and blister properly.
Beyond mozzarella: the supporting cheeses and how they behave
Mozzarella carries the pizza, but the cheeses you blend around it are where character comes from — and each behaves differently under heat. A hard aged cheese like Parmigiano or Pecorino brings salt and savor but barely melts; it is a finishing dust, grated fine over the top or applied after the bake, not a melting cheese. Provolone, by contrast, melts beautifully and adds a sharper, tangier pull than mozzarella alone — it is the backbone of a lot of American pizzeria blends for exactly that reason.
Fattier, softer cheeses behave like fresh mozzarella: they carry water and oil that can flood a fast bake. Burrata is the extreme case — its creamy center is almost pure moisture, which is why I never bake it. I tear it over the finished pizza so the residual heat warms it without breaking it into a greasy puddle. The same goes for fresh ricotta on a white pizza: dollop it in small mounds, not a layer, and accept that it is there for richness, not for melt. The melt math of combining these into a working blend is its own subject, and I map the exact ratios I use per oven in the cheese blend melting guide.
The principle that ties them together: every cheese sits somewhere on a scale from “melts and stretches” to “browns and crisps” to “just adds flavor.” A good blend uses one of each — a melter for body, a browner for color, an aged grating cheese for savor — rather than piling on three melters and wondering why the top is a flat white sheet. Restraint applies to cheese variety as much as to topping count.
Build order: the sequence on the peel changes the result
The order you layer a pizza is not arbitrary, and getting it wrong is a quiet cause of soggy, uneven pies. My default sequence is sauce first, then a light dusting of any hard grating cheese, then the mozzarella in islands, then any pre-cooked toppings tucked partly under or between the cheese, and finally a thread of oil. The logic is heat management: the cheese partly shields the sauce from scorching while still leaving gaps for the heat to set the base, and tucking meats near the cheese keeps them from drying out in the direct blast.
Delicate, raw, or cured finishes — basil, arugula, prosciutto, a squeeze of lemon, flaky salt — never touch the oven. They go on in the ten seconds after the peel comes out, while the surface is still molten. This single habit fixes more “my toppings taste burnt and bitter” complaints than any temperature change. A pizza is assembled fast and launched faster, so I lay everything out in order before I even shape the dough; a slow build means a wet, sticking base before you ever reach the oven. That launch discipline ties back into the bake technique that gets the whole thing off the peel cleanly.
The dough still comes first — and toppings interact with it
I am a dough-first baker, and toppings are downstream of the dough in a way most people miss. A well-fermented dough with proper oven spring lifts its toppings up and away from the steam; an under-proofed, dense dough sits flat and soaks up every drop of moisture the toppings shed. If your center is gummy, the toppings get blamed, but the real culprit is often a same-day dough that never developed the structure to support a load. The cold-ferment schedules that build that structure are in the 48-hour cold ferment method, and the whole foundation is in the complete dough guide.
Hydration matters here too. A higher-hydration dough sets faster on a hot surface and resists going gummy under a wet topping; a stiffer dough is less forgiving of a heavy sauce. If you are fighting soggy centers, the lever is often the dough and the launch, not the cheese. The same starter that runs my fermentation bench raises every pizza on this site — the oven is just the last 90 seconds of a 48-hour process, and the toppings are the easiest part to get right once the dough is honest.
The restraint principle: why three toppings beat ten
The most common upgrade I recommend costs nothing: take things off. A Margherita — sauce, mozzarella, basil, oil — is the benchmark every other pizza is judged against precisely because it has nowhere to hide. Each added topping is more water, more weight, more thermal load, and a smaller margin for the center to set. The pizzaioli I respect build pizzas of two or three deliberate ingredients, not ten competing ones.
If you want to load a pizza, do it in a longer-baking style designed for it — a Detroit pan or a thick Sicilian, where the bake runs long enough to actually cook a heavier topping load and the pan protects the base from the moisture. Match the style to the load. A loaded Neapolitan is a contradiction; a loaded pan pizza is a tradition. Choosing the right style for what you want to put on top is half the battle, and the styles at home guide maps which style suits which oven and which load.
Put all of it together and the toppings question stops being about taste and becomes about thermodynamics. Pick a cheese whose moisture matches your bake window, start your sauce from dense tomatoes you crush by hand, pre-cook or thin-slice anything that needs time, finish the delicate things off the heat, and keep the load light enough that the center can set. Do that and the cheapest pizza on your table — sauce, mozzarella, basil — will outscore any ten-topping monster. The oven gets the glory, but the toppings are where most home pizzas are quietly lost or won.
Frequently asked questions
Why does my pizza center come out raw and gummy?
Almost always too much water on top, not too little heat. A watery sauce, undrained fresh mozzarella, or raw vegetables that flood the base will steam the center before it sets. Cut sauce and cheese to about 80-100g each, drain wet ingredients, and pre-cook anything that sheds water.
Which toppings survive a 90-second Neapolitan bake?
Cured meats like pepperoni, low-water cheese, hand-crushed sauce, and anything pre-cooked. Raw sausage, thick onion, mushrooms, peppers, and fresh basil do not – they stay raw, flood the pie, or burn. Pre-cook or thin-slice everything, and add delicate items like basil and prosciutto after the bake.
How much cheese should go on a 12-inch pizza?
Roughly 80-100g, applied in islands rather than a solid sheet. A solid cheese lid traps steam and prevents leoparding. Gaps let heat reach the sauce and crust and let moisture escape upward instead of soaking into the base.
Should I add basil before or after baking?
After, every time. Fresh basil added before a hot bake turns black and bitter within seconds. Tear it over the pizza the moment it comes out of the oven so the residual heat releases its aroma without scorching it.
Is fresh or low-moisture mozzarella better for pizza?
It depends on your oven. Fresh mozzarella suits short, hot bakes where its water flashes off into milky pools. Low-moisture suits longer home-oven bakes because it sheds little water and melts into a cohesive, browning layer. Many of my best home-oven pies use a deliberate blend.
Does a heavier topping load really ruin a pizza?
On a fast bake, yes. Every topping adds water and thermal load, shrinking the margin for the center to set. Three deliberate toppings beat ten competing ones. If you want a loaded pizza, use a longer-baking pan style like Detroit that is built to cook a heavier load.
Related guides — the full toppings and cheese cluster
- Fresh vs dry mozzarella for pizza: which to use
- Best canned tomatoes for pizza sauce
- Toppings that survive a 90-second bake
- Cheese blend melting guide for pizza
- How to make pizza dough: the complete guide
- Pizza styles at home: match the style to your oven

About Kenny Nyhus Fadil
A home pizza maker documenting deck temps, dough logs, and the occasional wrecked launch.