Pizza Oven Accessories: The Complete Guide

Spend money on a pizza oven and the accessories aisle will try to sell you another oven’s worth of gear. The honest list is short: a launch peel, a turning peel, an IR thermometer, and a way to handle dough. Everything else is either a real convenience or backyard jewelry. After years of running the same dough across gas, dual-fuel, and indoor electric ovens, those four are the only accessories that have ever changed a slice in my dough log.
This guide sorts the whole accessory market into two piles — the gear that changes what comes off the deck, and the gear that just changes what your patio looks like. I’ll tell you which is which, who each piece is actually for, and the order I’d buy them in if I were starting over with a bare oven and a bag of flour.
The Accessory Hierarchy: Slice-Changers vs Silhouette-Changers
Only four accessory categories reliably change the pizza itself: a peel you can launch from clean, a turning peel for even bakes, an IR thermometer to read the stone, and dough-handling kit that keeps your balls in shape. Everything else improves comfort, storage, or looks — useful, but not what separates a good bake from a bad one.
I think about this the way I think about every other bench I run: a pizza oven is a kiln you eat from, and the accessories either touch the thermal process or they don’t. The IR gun touches it — it tells me when the stone is in range. The launch peel touches it — a stuck launch ruins more pizzas than any oven flaw. A bamboo serving board does not touch it; it’s lovely and it changes nothing about the crumb. Sort your spending by that test and you stop buying the silhouette.
If you’ve already read my complete pizza oven buying guide, treat this as the second half of that decision: the oven is the platform, the accessories are what make it usable on a cold Tuesday night when you’ve got six dough balls proofed and one shot at dinner.
Launch and Turn: The Peels That Earn Their Place
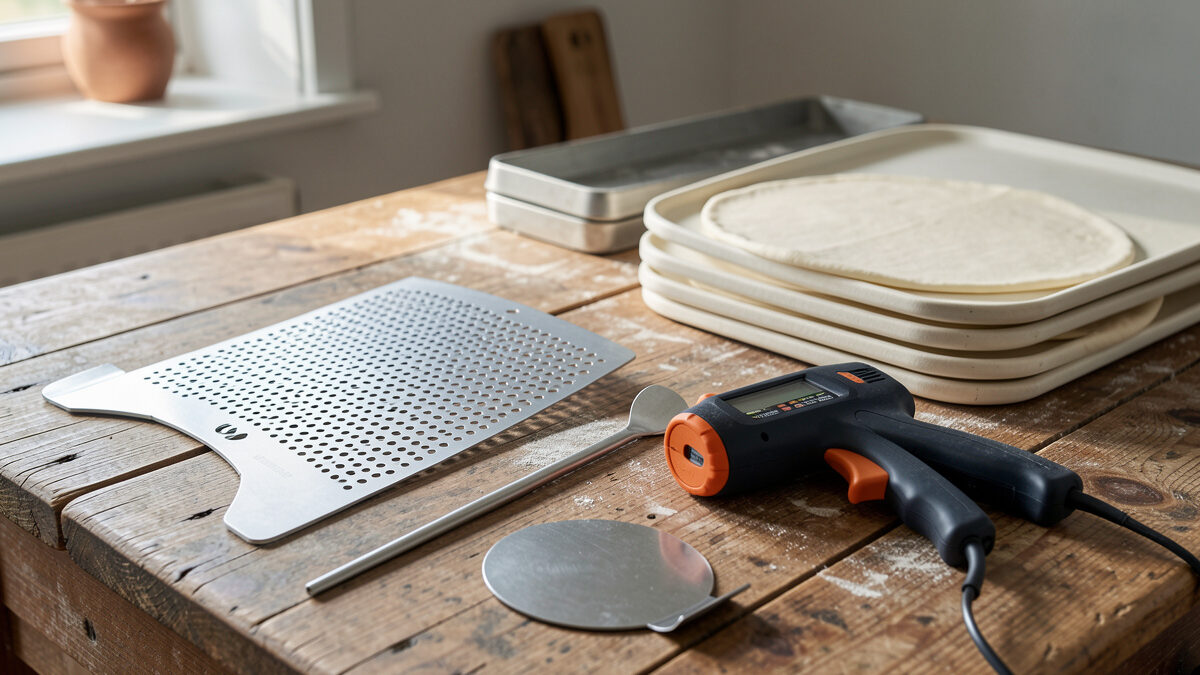
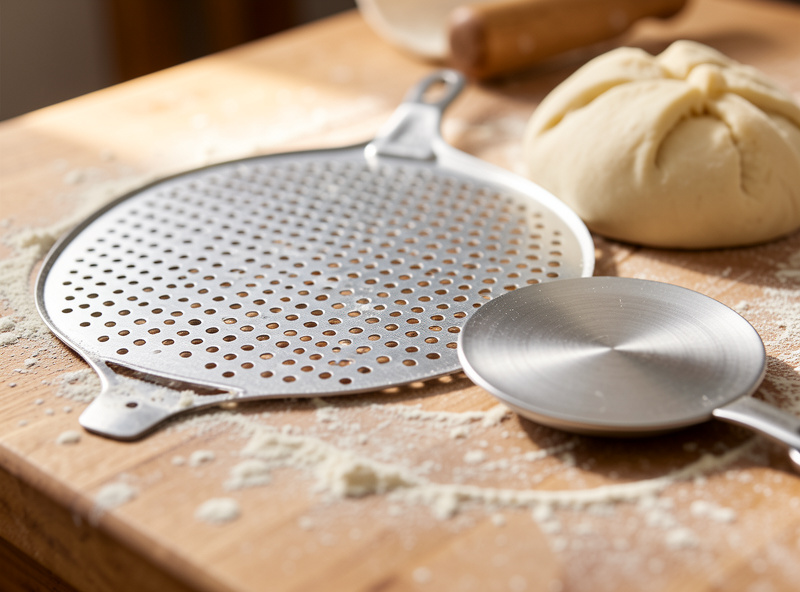
Two peels do two different jobs. The launch peel gets the raw pizza off your bench and onto the stone without sticking; the turning peel rotates the bake so one side doesn’t char while the other stays pale. In a 90-second oven you cannot do both jobs with one tool — I’ve tried, and the big launch peel is hopeless inside a hot chamber.
My launch peel is perforated aluminum. The holes shed loose flour on the way in, which is the single biggest fix for a stuck launch — excess semolina under the dough turns to grit and glue. The turning peel is a small round head on a long handle; you slide it under one edge, lift an inch, and spin. Getting that cadence right is its own skill, and I’ve broken it down separately in the pizza turning technique guide.
Size matters more than people expect. A peel that’s too small leaves the dough hanging off the edge; too big and it won’t clear the oven mouth. I cover the exact head dimensions for each oven class in the pizza peel size guide, and whether the turning peel is worth buying at all in the turning peel guide. If you’re still deciding between a metal and a wood launch peel, the perforated vs wooden peel breakdown settles that one.
The Instrument That Makes the Difference: The IR Thermometer
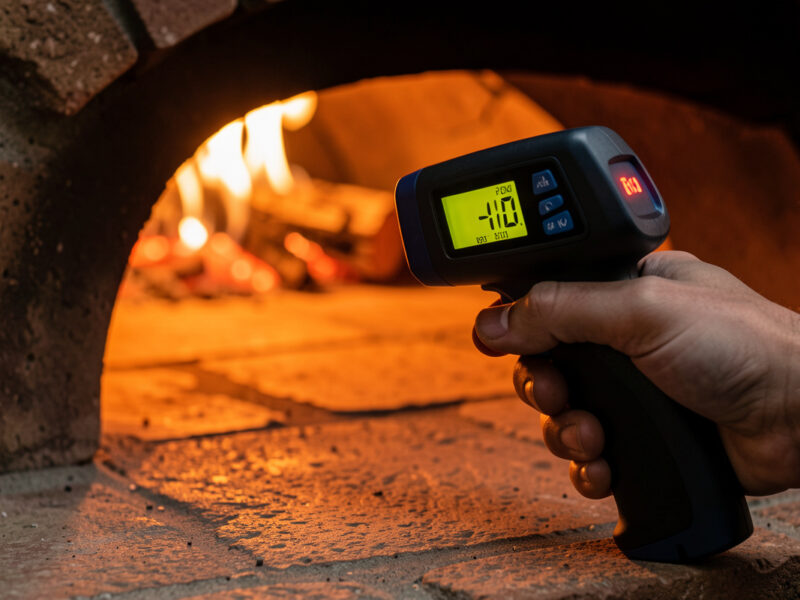
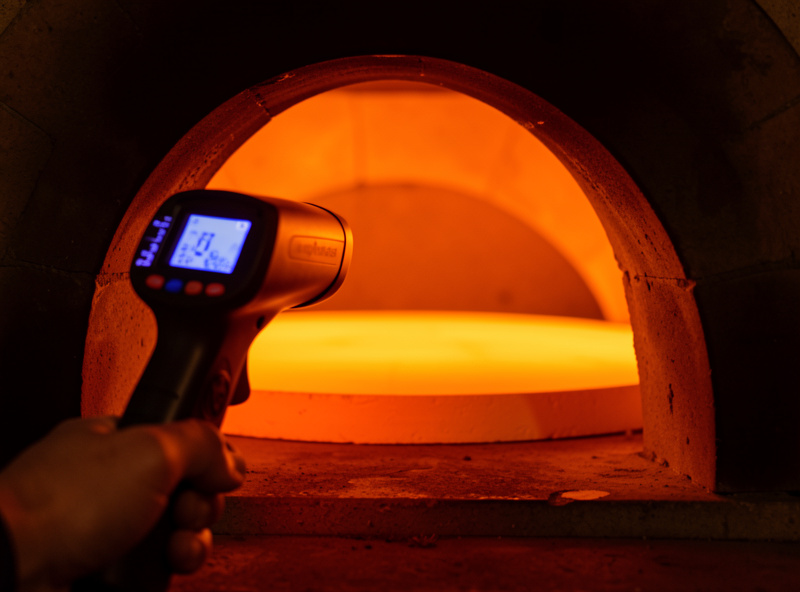
An infrared thermometer is the one accessory I’d refuse to bake without. It reads surface temperature in a second, which is the only number that decides whether you launch now or wait. A stone that looks ready and a stone that is ready are routinely 80–100°C apart, and the gun is what closes that gap. Guessing by eye is how you get a pale, gummy base under a charred top.
The IR gun reads the surface, not the air — and surface is what cooks the base. When I check the stone before a launch, I’m looking for a target range that matches the style: lower for a longer New York bake, hot for Neapolitan. The full target map lives in the pizza stone temperature by style guide, and the discipline of holding those numbers is in the temperature discipline guide.
One detail that matters in practice: where you point the gun. An IR thermometer averages a spot whose size grows with distance — a 12:1 unit reads a roughly one-inch patch at about a foot away — so I aim at the exact part of the stone the pizza will land on, dead center, not the cooler front lip or the screaming-hot zone right under the flame. Read the wrong spot and the number lies to you. I take two readings, center and edge, and launch off the center figure; the gap between the two is also how I tell whether the deck has heat-soaked evenly or just skinned over hot on top.
There’s a difference between buying one and using one well. Whether it’s worth the money for your setup is the IR thermometer worth-it question; the technique of where to aim it and how recovery time shows up on the readout is the read-the-stone guide. Both matter — the gun is only as good as the spot you point it at. As an Amazon Associate I earn from qualifying purchases. If you want a starting point, an infrared thermometer rated to 500°C or higher covers every home oven class.
Dough Handling: Trays, Scale, and Bench Knife
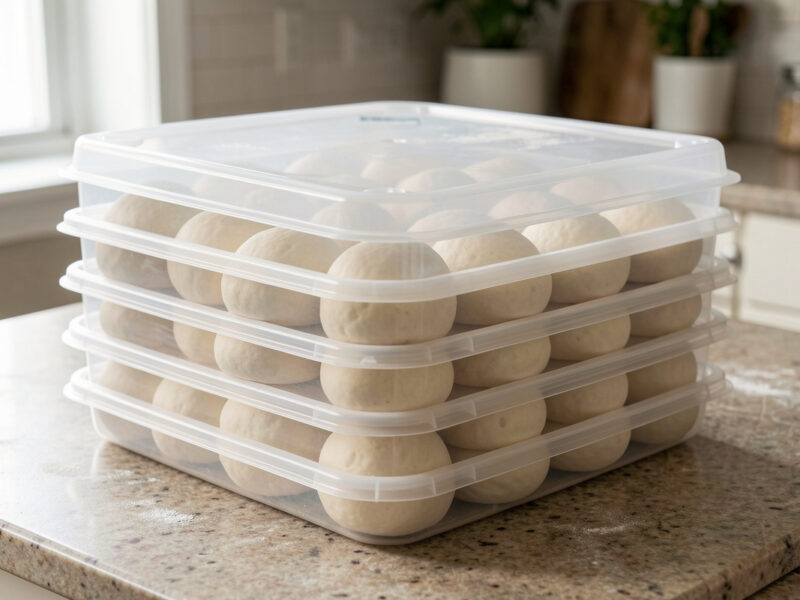
Dough is the variable I actually control, and the gear that protects a proofed ball is cheap and worth it. A proper proofing tray keeps the balls from skinning over and gives them room to relax; a 0.1-gram scale makes hydration repeatable; a bench knife divides and shapes without tearing. None of this is glamorous, but it’s where consistency comes from.
I keep my dough in a logged protocol — hydration, ferment time and temperature, flour, result — and the tray is part of that. A stack of lidded trays in the fridge running a 48-hour cold ferment is the standing default on my bench. The right tray dimensions and why a dedicated proofing box beats a sheet pan are in the dough proofing tray guide. For the dough itself, start with hydration explained and the complete dough guide; for keeping the balls right once they’re made, dough ball storage.
The scale is the unsung hero. Pizza is a percentages craft, and you cannot hit 65% hydration by eye. A 0.1g scale turns “it depends” into a recipe you can copy from one bake to the next — the same instinct I bring to every fermentation project on the bench.
Fuel and Running Gear: Regulators and Cold-Weather Reality
Gas ovens live and die by the regulator, and most cold-weather flame problems trace straight back to it. A regulator meters propane from the tank to the burner; in the cold, propane vapor pressure drops, and a marginal regulator starves the flame exactly when you need full heat. Baking outdoors at -5°C taught me this the hard way before I understood what was happening.
Knowing which regulator your oven needs, when to replace the one in the box, and how propane behaves in winter is the difference between a confident bake and a flame that won’t recover between pizzas. I’ve put the whole thing together in the pizza oven gas regulator guide, and the broader cold-climate playbook is in baking in cold and wind. If you’re choosing between fuels in the first place, the gas vs wood breakdown covers what each actually delivers, and the indoor electric verdict is the Swedish-winter alternative I lean on for half the year.
Storage and Longevity: Covers and Carts
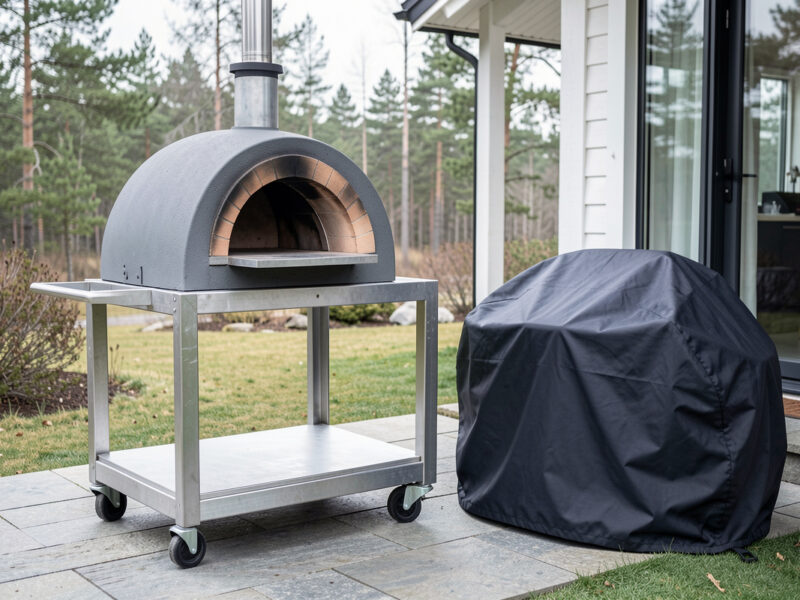
Covers and carts don’t change the slice, but they change how long the oven lasts and how pleasant it is to use. A cover keeps water out of the burner and rust off the steel; a cart gives you a stable, counter-height surface so you’re not launching off a wobbly camping table. These are silhouette gear — but the right kind of silhouette gear earns its keep over years.
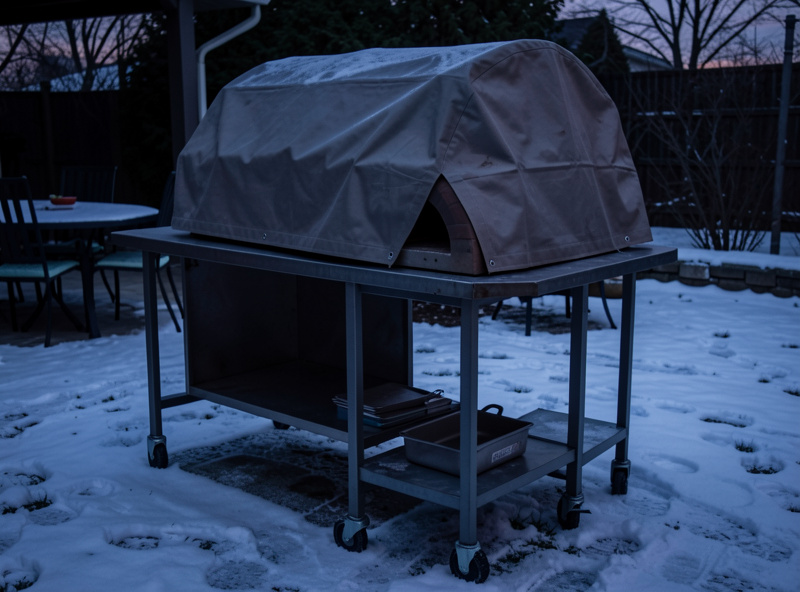
The trap is overspending. A breathable, well-fitted cover is worth real money; a branded one at triple the price of a generic equivalent is not. Carts are the same — stability and the right height matter, the logo doesn’t. I weigh the genuinely useful options against the markup in the pizza oven cover and cart guide. And whatever you store, the stone and steel care guide keeps the surface itself alive — a cracked stone from trapped moisture costs more than any cover.
Accessory Priority: What I’d Buy, in Order
Here is how the categories stack up by what they change versus what they cost. If your budget is finite — and whose isn’t — buy down this list from the top and stop when the spending stops touching the slice.
| Accessory | What it changes | Worth it for | Rough street price |
|---|---|---|---|
| Perforated launch peel | Stops stuck launches — the #1 ruined-pizza cause | Everyone, day one | $30–$60 |
| IR thermometer | Tells you when to launch (surface temp) | Everyone, day one | $20–$40 |
| Turning peel | Even bake in fast ovens; no charred edge | Gas/wood ovens under 2 min | $25–$50 |
| Dough proofing trays | Better ball shape, easier launch | Anyone baking 4+ pizzas | $25–$45 per pair |
| 0.1g scale | Repeatable hydration | Anyone chasing consistency | $12–$25 |
| Gas regulator (upgrade) | Flame stability, esp. in cold | Gas owners in cold climates | $20–$45 |
| Cover | Rust/water protection, longevity | Outdoor-stored ovens | $30–$70 |
| Cart | Stable launch height | No fixed counter nearby | $120–$300 |
Notice what’s missing: branded peels at boutique prices, infrared “pizza-specific” guns that are a generic meter with a logo, and the pizza-oven “starter kits” that bundle a serving board and a cutter you already own. The four slice-changers at the top — peel, thermometer, turning peel, trays — are where the money does work. The rest is comfort, and comfort is fine as long as you know that’s what you’re buying.
How the Accessories Match Your Oven Class
The right kit shifts with the oven. A fast gas oven like the Ooni Koda 16 makes the turning peel close to mandatory — the bake is too quick to rescue an uneven side any other way. An indoor electric at a steadier 450°C is more forgiving, so the turning peel is optional and the IR gun matters more for confirming the stone has heat-soaked. A steel in a home oven running the broiler method needs almost none of the outdoor gear but lives and dies by the IR reading and the launch peel.
That’s the real lesson from running the same dough across all of them: the dough is the constant, the oven sets the pace, and the accessories are how you keep up with that pace. Get the oven sized right first — the size guide covers that — then layer the accessories that match how fast it bakes.
Safety and Maintenance Gear Worth Owning
A small tier of gear sits between slice-changers and jewelry: it doesn’t improve the pizza, but it keeps you and the oven intact. Heat-proof gloves rated for the mouth of a 450°C-plus oven, a stiff brass brush for clearing the stone between bakes, and a metal ash tool for wood and dual-fuel ovens all belong here. None are optional once you’ve reached into a hot chamber bare-handed exactly once.
Gloves are the one I’d insist on. Launching, turning, and pulling a pizza all happen inches from a chamber hot enough to glow, and a welding-grade or aramid glove is cheap insurance against a burn that ends your evening. I keep a pair clipped to the cart so I’m never tempted to skip them. For cleaning, a quick brush of the stone between bakes clears char that would otherwise smoke and stick to the next base — but skip the chemical stone cleaners entirely; the stone and steel care guide explains why water and heat are all a baking surface ever needs.
In the cold, add a simple infrared-and-patience routine rather than more gear: let the oven heat-soak fully, which I cover in heat soak explained, and watch your recovery time between pizzas with the IR gun. The gear that keeps you safe and the stone clean costs little and lasts for years — it’s the quiet half of the accessory list nobody photographs for the catalog.
Accessories That Look Essential But Aren’t
The pizza-oven market is very good at selling solutions to problems you don’t have. A few categories show up on every “must-have” list and earn a permanent spot in my “buy later or never” pile, because in hundreds of bakes they’ve never changed a result I could measure.
The pizza rocker — that big curved blade — is the clearest example. It looks the part and it cuts no better than a $10 wheel cutter once your crust is properly baked. If your pizza is hard to cut, the problem is an underbaked base, not your knife, and the fix is in the temperature discipline guide, not the cutlery drawer. The same goes for laser-etched serving boards and branded pizza “kits”: a bundle of a cutter, a board, and a flimsy peel at a premium price is three things you either already own or shouldn’t buy.
“Pizza-specific” infrared thermometers are another markup trap. The physics of reading a hot surface doesn’t care about the logo on the gun. Any meter rated to at least 500°C with a tight enough optical spot does the job; you’re paying for branding, not accuracy. And dough mixers occupy a genuine grey zone — a spiral mixer is wonderful if you bake in volume, but for two to six dough balls a week, hand-mixing builds better feel for the dough than any machine. I mix by hand more often than not, and my dough guide assumes you will too.
None of this is about being a purist. It’s about where the money does work. Every dollar that goes to a rocker or a branded board is a dollar that didn’t go to the launch peel or the thermometer that actually decides whether dinner comes out right. Sort by the slice test — does this touch the bake? — and the “essential” list collapses to the four things at the top of the priority table.
The One Upgrade That Beats Every Accessory
If I could hand a frustrated new oven owner exactly one thing, it wouldn’t be a peel or a thermometer — it would be a colder, longer ferment and a scale to make it repeatable. The cheapest upgrade in pizza is flour and time, and it out-performs every piece of gear in this guide. A dough that’s been cold-fermented for 48 hours launches cleaner, springs harder, and chars more evenly than a same-day dough, in any oven, with any peel.
This is the dough-first argument that runs through everything on this site. The oven is just the last 90 seconds of a multi-day process; the same starter and the same logged protocol raise every pizza I bake, whether it lands on the Koda’s stone or under the home-oven broiler. A 0.1-gram scale at the price of a takeaway pizza is what turns that process from luck into a recipe. You weigh the flour, the water, the salt, and the yeast or starter to the tenth of a gram, write it in the log, and next week you can reproduce the bake exactly or change one variable on purpose.
Start with hydration explained to pick your water percentage, then run a 48-hour cold ferment as your default and store the balls properly per the storage guide. Do that for a month before you spend another krona on accessories. Most people discover their “oven problem” was a dough problem all along — and the gear they thought they needed turns out to be the launch peel and the thermometer, nothing more.
That’s the whole philosophy of this accessory guide in one line: buy the four things that touch the bake, master the dough that feeds them, and let the patio jewelry wait. An oven full of accessories won’t save a bad dough, but a good dough forgives a surprising amount of cheap gear.
Frequently Asked Questions
What pizza oven accessories are actually worth buying?
Four change the pizza itself: a perforated launch peel, an IR thermometer, a turning peel for fast ovens, and dough proofing trays. A 0.1g scale and a gas regulator upgrade round out the practical list. Covers and carts help longevity and comfort but do not change the slice.
Do I need a turning peel and a launch peel?
Yes, in a fast oven they do different jobs. The launch peel gets the raw pizza onto the stone without sticking; the turning peel rotates the bake so one side does not char. In a 90-second oven one tool cannot do both. In a slower 450C electric the turning peel is optional.
Is an infrared thermometer necessary for a pizza oven?
It is the one instrument I will not bake without. A stone that looks ready and one that is ready are often 80 to 100C apart, and the IR gun reads that surface temperature in a second. It is the number that decides whether you launch now or wait, and it costs 20 to 40 dollars.
What is the cheapest accessory upgrade that improves my pizza?
A 0.1-gram scale at 12 to 25 dollars, paired with a colder, longer ferment. Repeatable hydration changes more bakes than any expensive gadget. The cheapest upgrade of all is flour and time, not gear, but a scale is what makes the dough side repeatable.
Do I need a cover and cart for my pizza oven?
Only if you store the oven outdoors or lack a stable launch surface. A cover keeps water out of the burner and rust off the steel; a cart gives counter-height stability. Neither changes the cooked pizza, so buy them last and skip the branded markup.
Why does my gas pizza oven lose heat in cold weather?
Usually the regulator. Propane vapor pressure drops in the cold, and a marginal regulator starves the burner exactly when you need full heat. Replacing a weak regulator and managing the tank in winter restores flame stability, which is why cold-climate gas owners should treat the regulator as a real accessory.
Related Guides
- Pizza Peel Size Guide: Match the Head to Your Oven
- Turning Peel Guide: Is It Worth Buying?
- Pizza Dough Proofing Trays: What to Buy
- IR Thermometer for Pizza Ovens: Worth It?
- Pizza Oven Covers and Carts Guide
- Pizza Oven Gas Regulator Guide

About Kenny Nyhus Fadil
A home pizza maker documenting deck temps, dough logs, and the occasional wrecked launch.